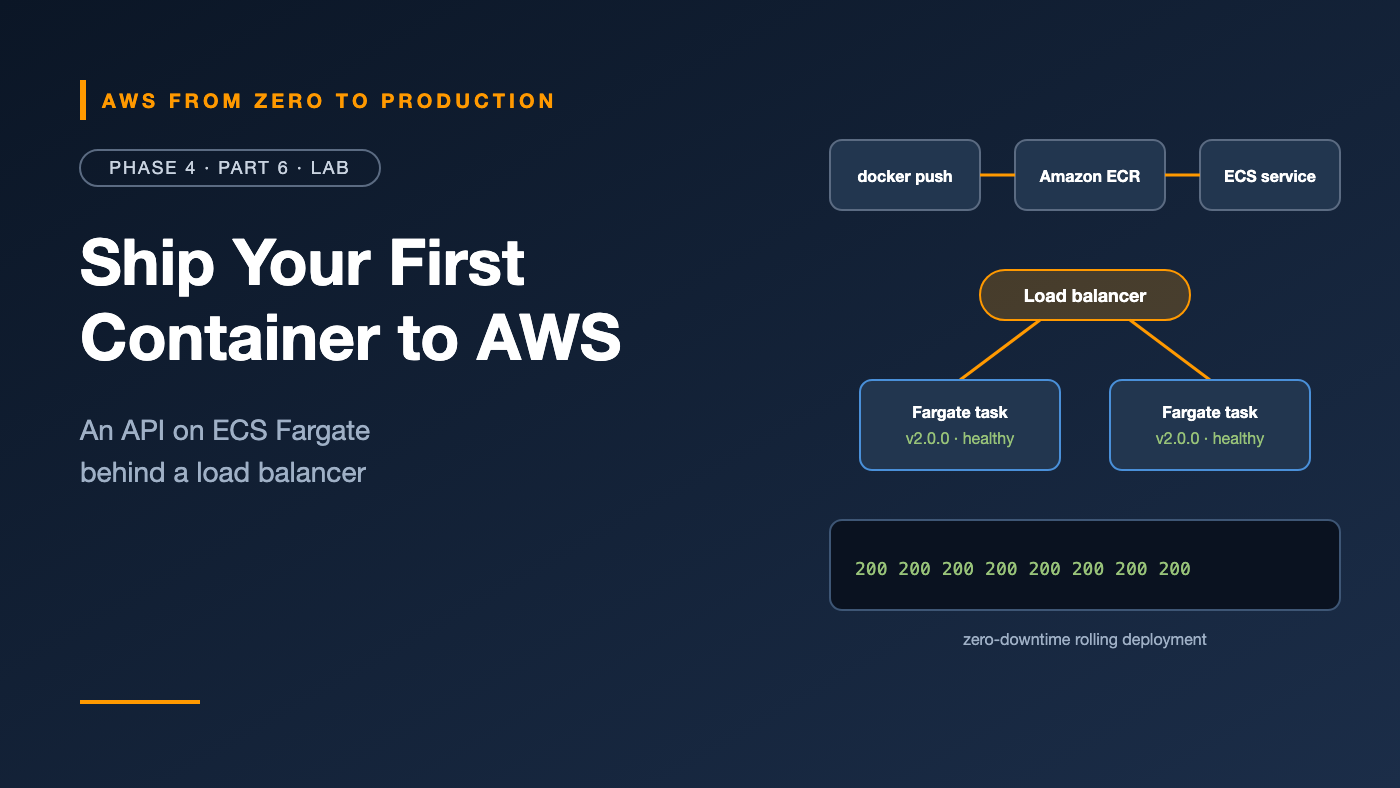
AWS from Zero to Production — Phase 4, Part 6 of 6 · See the full series roadmap
Reading about task definitions and execution roles is one thing. Watching your own container come up healthy behind a load balancer — and then rolling out a new version while curl keeps getting answers the whole time — is another.
That’s this lab.
You’ll go from an empty folder to a containerized API running on AWS Fargate in private subnets, reachable only through an Application Load Balancer. Then you’ll ship version 2 with a rolling deployment protected by the circuit breaker.
This is the exact shape of the capstone architecture — and the service you’ll connect to a database in Phase 5 and deploy from GitHub Actions in Phase 7.
What you’ll build
- 🐍 A tiny Python API, packaged as a container image
- 🗄️ An Amazon ECR repository with scan-on-push and immutable tags
- 🏠 A two-AZ VPC with public and private subnets
- 🔐 An ECS task execution role
- 🧩 An ECS cluster, task definition, and service on Fargate
- ⚖️ An Application Load Balancer with health checks
- 🚀 A zero-downtime rolling deployment of version 2
Internet
   |
   v
Application Load Balancer (public subnets, port 80)
   |   health check: GET /health
   v
ECS service "orders-api" (private subnets, no public IPs)
   +-- Fargate task (AZ a)   image: orders-api:1.0.0
   +-- Fargate task (AZ b)   image: orders-api:1.0.0
   |
   +-- pulls image from Amazon ECR (through the NAT gateway)
   +-- writes logs to CloudWatch Logs
Prerequisites
- Your Phase 1 sandbox with the
sandboxCLI profile, and permissions for ECR, ECS, EC2, Elastic Load Balancing, IAM, and CloudWatch Logs - AWS CLI v2
- Docker installed and running locally (Docker Desktop or an equivalent)
- A bash or zsh terminal
- About 75–90 minutes
Cost note: This lab uses a NAT gateway, an Application Load Balancer, two small Fargate tasks, and public IPv4 addresses — all billed by the hour, plus small amounts for ECR storage and logs. Finished in an afternoon, it typically costs a small amount, but it keeps charging until you run Cleanup — especially the NAT gateway. Check current pricing first.
Keep one terminal open. Later steps use shell variables from earlier ones.
Step 1: Write the API
Create a project folder:
mkdir orders-api && cd orders-api
Create app.py:
import os
import socket

from flask import Flask, jsonify

app = Flask(__name__)
VERSION = os.environ.get("APP_VERSION", "dev")


@app.get("/")
def index():
    return jsonify(
        service="orders-api",
        version=VERSION,
        host=socket.gethostname(),
    )


@app.get("/health")
def health():
    return jsonify(status="ok")
Create requirements.txt:
flask==3.1.*
gunicorn==23.*
Create Dockerfile:
FROM public.ecr.aws/docker/library/python:3.12-slim

WORKDIR /app
COPY requirements.txt .
RUN pip install --no-cache-dir -r requirements.txt
COPY app.py .

USER 1000
EXPOSE 8080
CMD ["gunicorn", "--bind", "0.0.0.0:8080", "--workers", "2", "app:app"]
The base image comes from the ECR Public Gallery, which avoids Docker Hub rate limits.
Version pins: These are recent versions at the time of writing. Check for the latest before you run the lab.
Step 2: Build and test locally
docker build --platform linux/amd64 -t orders-api:1.0.0 .

docker run --rm -d -p 8080:8080 -e APP_VERSION=1.0.0 --name orders-test orders-api:1.0.0
curl -s localhost:8080
curl -s localhost:8080/health
docker stop orders-test
--platform linux/amd64 makes sure the image matches the x86 Fargate tasks you’ll run, even on an Apple silicon Mac.
✅ Checkpoint: You see {"host":"...","service":"orders-api","version":"1.0.0"} and {"status":"ok"}.
Step 3: Create an ECR repository and push the image
export AWS_PROFILE=sandbox
export AWS_REGION=us-east-1

ACCOUNT_ID=$(aws sts get-caller-identity --query Account --output text)
REGISTRY="$ACCOUNT_ID.dkr.ecr.$AWS_REGION.amazonaws.com"

aws ecr create-repository \
  --repository-name orders-api \
  --image-scanning-configuration scanOnPush=true \
  --image-tag-mutability IMMUTABLE

aws ecr get-login-password \
  | docker login --username AWS --password-stdin "$REGISTRY"

docker tag orders-api:1.0.0 "$REGISTRY/orders-api:1.0.0"
docker push "$REGISTRY/orders-api:1.0.0"
Check the scan results:
aws ecr describe-image-scan-findings \
  --repository-name orders-api --image-id imageTag=1.0.0 \
  --query 'imageScanFindings.findingSeverityCounts'
✅ Checkpoint: The image appears in the ECR console with a completed scan. A few low or medium findings from the base image are normal; Phase 7 turns these into a pipeline gate.
Step 4: Create the network
You built a VPC by hand in Phase 3. This time, use the console wizard to save time:
- Open the VPC console and choose Create VPC.
- Choose VPC and more.
- Name tag auto-generation:
lab4. - IPv4 CIDR:
10.0.0.0/16. - Number of Availability Zones: 2.
- Public subnets: 2. Private subnets: 2.
- NAT gateways: In 1 AZ.
- VPC endpoints: S3 Gateway.
- Choose Create VPC and wait for it to finish.
Why a NAT gateway here? Fargate tasks in private subnets need a path to ECR and CloudWatch Logs. A NAT gateway is the simplest path. In production, you might use interface endpoints instead (Phase 3, Part 3) — and one NAT gateway per AZ.
Now capture the IDs:
VPC_ID=$(aws ec2 describe-vpcs --filters Name=tag:Name,Values=lab4-vpc \
  --query 'Vpcs[0].VpcId' --output text)

PUBLIC_SUBNETS=$(aws ec2 describe-subnets \
  --filters Name=vpc-id,Values="$VPC_ID" Name=tag:Name,Values='*public*' \
  --query 'Subnets[].SubnetId' --output text)

PRIVATE_SUBNETS=$(aws ec2 describe-subnets \
  --filters Name=vpc-id,Values="$VPC_ID" Name=tag:Name,Values='*private*' \
  --query 'Subnets[].SubnetId' --output text)

echo "$VPC_ID | $PUBLIC_SUBNETS | $PRIVATE_SUBNETS"
✅ Checkpoint: You see one VPC ID, two public subnet IDs, and two private subnet IDs.
Step 5: Create security groups
ALB_SG=$(aws ec2 create-security-group --vpc-id "$VPC_ID" \
  --group-name lab4-alb-sg --description "orders-api load balancer" \
  --query GroupId --output text)

APP_SG=$(aws ec2 create-security-group --vpc-id "$VPC_ID" \
  --group-name lab4-app-sg --description "orders-api tasks" \
  --query GroupId --output text)

aws ec2 authorize-security-group-ingress --group-id "$ALB_SG" \
  --protocol tcp --port 80 --cidr 0.0.0.0/0

aws ec2 authorize-security-group-ingress --group-id "$APP_SG" \
  --protocol tcp --port 8080 --source-group "$ALB_SG"
Tasks accept traffic on port 8080 only from the load balancer.
Step 6: Create the execution role and log group
The execution role lets ECS pull the image and write logs:
cat > ecs-trust.json <<'EOF'
{
  "Version": "2012-10-17",
  "Statement": [{
    "Effect": "Allow",
    "Principal": { "Service": "ecs-tasks.amazonaws.com" },
    "Action": "sts:AssumeRole"
  }]
}
EOF

aws iam create-role --role-name lab4-ecs-execution \
  --assume-role-policy-document file://ecs-trust.json

aws iam attach-role-policy --role-name lab4-ecs-execution \
  --policy-arn arn:aws:iam::aws:policy/service-role/AmazonECSTaskExecutionRolePolicy

EXEC_ROLE_ARN=$(aws iam get-role --role-name lab4-ecs-execution \
  --query Role.Arn --output text)

aws logs create-log-group --log-group-name /ecs/orders-api
aws logs put-retention-policy --log-group-name /ecs/orders-api --retention-in-days 7
This API doesn’t call any AWS services, so it doesn’t need a task role yet. You’ll add one in Phase 5, when it reads a database secret.
✅ Checkpoint: The role lab4-ecs-execution exists with the managed policy attached, and the log group has a 7-day retention.
Step 7: Create the cluster and task definition
aws ecs create-cluster --cluster-name lab4-cluster
Write a task definition, filling in your values:
cat > taskdef.json <<EOF
{
  "family": "orders-api",
  "networkMode": "awsvpc",
  "requiresCompatibilities": ["FARGATE"],
  "cpu": "256",
  "memory": "512",
  "runtimePlatform": { "cpuArchitecture": "X86_64", "operatingSystemFamily": "LINUX" },
  "executionRoleArn": "$EXEC_ROLE_ARN",
  "containerDefinitions": [
    {
      "name": "orders-api",
      "image": "$REGISTRY/orders-api:1.0.0",
      "essential": true,
      "portMappings": [{ "containerPort": 8080, "protocol": "tcp" }],
      "environment": [{ "name": "APP_VERSION", "value": "1.0.0" }],
      "logConfiguration": {
        "logDriver": "awslogs",
        "options": {
          "awslogs-group": "/ecs/orders-api",
          "awslogs-region": "$AWS_REGION",
          "awslogs-stream-prefix": "app"
        }
      }
    }
  ]
}
EOF

aws ecs register-task-definition --cli-input-json file://taskdef.json \
  --query 'taskDefinition.taskDefinitionArn' --output text
✅ Checkpoint: The output ends in task-definition/orders-api:1.
Step 8: Create the load balancer
ALB_ARN=$(aws elbv2 create-load-balancer \
  --name lab4-alb --type application --scheme internet-facing \
  --subnets $PUBLIC_SUBNETS --security-groups "$ALB_SG" \
  --query 'LoadBalancers[0].LoadBalancerArn' --output text)

TG_ARN=$(aws elbv2 create-target-group \
  --name lab4-orders-tg \
  --protocol HTTP --port 8080 \
  --vpc-id "$VPC_ID" \
  --target-type ip \
  --health-check-path /health \
  --health-check-interval-seconds 15 \
  --healthy-threshold-count 2 \
  --query 'TargetGroups[0].TargetGroupArn' --output text)

aws elbv2 create-listener \
  --load-balancer-arn "$ALB_ARN" --protocol HTTP --port 80 \
  --default-actions Type=forward,TargetGroupArn="$TG_ARN"

aws elbv2 modify-target-group-attributes --target-group-arn "$TG_ARN" \
  --attributes Key=deregistration_delay.timeout_seconds,Value=30
Notes:
- The target type is
ip, because each Fargate task has its own IP address. $PUBLIC_SUBNETSis intentionally unquoted, so it expands into two subnet IDs.- A shorter deregistration delay makes deployments in this lab faster. The default is 300 seconds.
Step 9: Create the ECS service
SUBNETS_CSV=$(echo $PRIVATE_SUBNETS | tr ' ' ',')

aws ecs create-service \
  --cluster lab4-cluster \
  --service-name orders-api \
  --task-definition orders-api \
  --desired-count 2 \
  --launch-type FARGATE \
  --network-configuration "awsvpcConfiguration={subnets=[$SUBNETS_CSV],securityGroups=[$APP_SG],assignPublicIp=DISABLED}" \
  --load-balancers "targetGroupArn=$TG_ARN,containerName=orders-api,containerPort=8080" \
  --health-check-grace-period-seconds 30 \
  --deployment-configuration "deploymentCircuitBreaker={enable=true,rollback=true},minimumHealthyPercent=100,maximumPercent=200"

aws ecs wait services-stable --cluster lab4-cluster --services orders-api
What these settings mean:
assignPublicIp=DISABLED: tasks get private IPs only.minimumHealthyPercent=100,maximumPercent=200: during a deployment, ECS starts new tasks before stopping old ones, so capacity never drops.- Circuit breaker with rollback: a broken deployment rolls back automatically.
✅ Checkpoint: The wait command returns, and the ECS console shows 2/2 tasks running.
Step 10: Test it
ALB_DNS=$(aws elbv2 describe-load-balancers --load-balancer-arns "$ALB_ARN" \
  --query 'LoadBalancers[0].DNSName' --output text)

for i in 1 2 3 4 5 6; do curl -s "http://$ALB_DNS/"; echo; done
You’ll see version 1.0.0, with two different host values — one per task.
Look at the logs:
aws logs tail /ecs/orders-api --since 10m
✅ Checkpoint: Responses come from two tasks, and the logs show the health checks and your requests.
Step 11: Deploy version 2 with zero downtime
Change something visible. In app.py, add a field to the index response:
message="Now with 100% more features",
Build and push a new tag — remember, tags are immutable:
docker build --platform linux/amd64 -t "$REGISTRY/orders-api:2.0.0" .
docker push "$REGISTRY/orders-api:2.0.0"
Create a new task definition revision:
sed -e 's/orders-api:1.0.0/orders-api:2.0.0/' \
    -e 's/"value": "1.0.0"/"value": "2.0.0"/' \
    taskdef.json > taskdef-v2.json

aws ecs register-task-definition --cli-input-json file://taskdef-v2.json \
  --query 'taskDefinition.revision'
In a second terminal, start polling the load balancer. Use your load balancer DNS name:
while true; do curl -s -o /dev/null -w "%{http_code} " http://YOUR_ALB_DNS/; sleep 0.5; done
Back in the first terminal, deploy:
aws ecs update-service --cluster lab4-cluster --service orders-api \
  --task-definition orders-api:2

aws ecs wait services-stable --cluster lab4-cluster --services orders-api
✅ Checkpoint: The polling terminal shows a steady stream of 200 with no errors, and curl http://$ALB_DNS/ now returns version 2.0.0 with your new message. Stop polling with Ctrl+C.
Step 12 (optional): Watch the circuit breaker save you
Deploy a task definition that can’t start — for example, an image tag that doesn’t exist:
sed -e 's/orders-api:1.0.0/orders-api:does-not-exist/' taskdef.json > taskdef-bad.json
aws ecs register-task-definition --cli-input-json file://taskdef-bad.json \
  --query 'taskDefinition.revision'

aws ecs update-service --cluster lab4-cluster --service orders-api \
  --task-definition orders-api:3
Watch the Deployments tab in the ECS console. New tasks fail to start, the circuit breaker trips, and ECS rolls back to revision 2 on its own. Your two healthy tasks keep serving traffic the whole time.
Patience: The circuit breaker waits for several failed task launches before it trips, so this can take a while.
Cleanup
# 1. ECS service and cluster
aws ecs update-service --cluster lab4-cluster --service orders-api --desired-count 0
aws ecs delete-service --cluster lab4-cluster --service orders-api --force
aws ecs wait services-inactive --cluster lab4-cluster --services orders-api
aws ecs delete-cluster --cluster lab4-cluster

# 2. Load balancer and target group
aws elbv2 delete-load-balancer --load-balancer-arn "$ALB_ARN"
aws elbv2 wait load-balancers-deleted --load-balancer-arns "$ALB_ARN"
aws elbv2 delete-target-group --target-group-arn "$TG_ARN"

# 3. ECR repository (and all images in it)
aws ecr delete-repository --repository-name orders-api --force

# 4. Logs and IAM
aws logs delete-log-group --log-group-name /ecs/orders-api
aws iam detach-role-policy --role-name lab4-ecs-execution \
  --policy-arn arn:aws:iam::aws:policy/service-role/AmazonECSTaskExecutionRolePolicy
aws iam delete-role --role-name lab4-ecs-execution

# 5. Security groups
aws ec2 delete-security-group --group-id "$APP_SG"
aws ec2 delete-security-group --group-id "$ALB_SG"
Then delete the network in the console:
- VPC console → NAT gateways: delete the
lab4NAT gateway, and wait until its state is Deleted. - Elastic IPs: release the address the NAT gateway used.
- Your VPCs: select
lab4-vpcand choose Actions → Delete VPC. This removes the subnets, route tables, internet gateway, and S3 endpoint.
Task definition revisions stay registered but cost nothing. You can deregister them in the ECS console.
If a security group won’t delete: load balancer and task network interfaces can take a few minutes to disappear. Wait, then retry.
✅ Final checkpoint: No NAT gateway, Elastic IP, load balancer, or ECS cluster remains — those are the resources that cost money.
Troubleshooting
exec format error in the task logs
Cause: the image was built for arm64 but the task runs on x86. Fix: rebuild with --platform linux/amd64, or set cpuArchitecture to ARM64.
CannotPullContainerError
Cause: the tasks can’t reach ECR — no NAT gateway route — or the execution role is missing. Fix: confirm the private route table sends 0.0.0.0/0 to the NAT gateway, and that the execution role has AmazonECSTaskExecutionRolePolicy.
Targets are unhealthy, and tasks keep restarting
Cause: lab4-app-sg doesn’t allow port 8080 from lab4-alb-sg, or the health check path is wrong. Fix: check the rule and that /health returns 200.
ResourceInitializationError about logs
Cause: the log group doesn’t exist, or the Region in the task definition is wrong. Fix: create the log group and check awslogs-region.
ImageTagAlreadyExistsException on push
Cause: tag immutability is working. Fix: use a new tag.
What you accomplished
- ✅ Containerized an API and pushed it to ECR with scanning and immutable tags
- ✅ Ran it on Fargate in private subnets with no public IPs
- ✅ Put it behind an Application Load Balancer with health checks
- ✅ Separated the execution role from the (future) task role
- ✅ Deployed a new version with zero downtime
- ✅ Saw the circuit breaker roll back a broken deployment
Quick self-check
Test yourself before moving on:
- Why does the target group use the
iptarget type? - Which settings guarantee capacity never drops during a deployment?
- Why did version 2 need a new image tag?
- What did ECS do when the bad deployment failed?
Answers
- Fargate tasks use
awsvpcnetworking, so each task has its own IP address. minimumHealthyPercent=100andmaximumPercent=200.- The repository has immutable tags.
- The circuit breaker stopped it and rolled back to the last working revision.
What’s next
Phase 5 covers storage and databases: S3, EBS, EFS, RDS, Aurora, DynamoDB, and caching. Its lab gives this API a private PostgreSQL database, with credentials in Secrets Manager and automated backups.
How long did your zero-downtime deployment take? Share your numbers — and any errors you hit — in the comments.